Welcome to another Tutorial Tuesday! Today we’ll be covering how to build a site-finding spreadsheet that will guide your prospecting.
Welcome to another Tutorial Tuesday! Today I’ll be covering how to build a spreadsheet (for free!) that will track and organize a list of sites for any outreach or content initiatives.
The goal is to create a spreadsheet that helps organize the many sites we'll target for writing. Whether you're writing around the web to gain authority, relationships or links–you need a solid organizational system. Why not make one for free?
Most online writers, freelancers and link builders alike, contact many target sites simultaneously. With so many targets floating around, it can be easy to forget details about each one or even mix up which site is which. Having a database of your contacts and ideas mitigates these issues.
If we're especially clever, the spreadsheet can also help us analyze the sites we find: Each column serves as a marker of quality you can scrutinize as you site-find. Especially for those just beginning their online writing portfolios, filling in a set list of site quality fields can help develop good prospecting habits and organize large amounts of data.

For my example today, I'll be looking for sites related to video games. Because my hypothetical client sells video game products. What kind of video game products? Don't ask difficult questions.
Creating Your Spreadsheet
The first thing you’ll need to do is to create a place to store all of your target sites. You can use any program you’d like (we use BuzzStream here at Page One Power), but not everyone has access to paid tools. So today I’ll be using Google Docs.
Especially if you’re operating on your own, simple spreadsheets are an excellent solution to your organization needs. Nothing beats versatile and free.
Not sure how to get started? Fear not, Cory wrote a post on creating spreadsheets in Google Docs!
The first column you need to add is the “URL” or “Site Name” column. This is for obvious reasons, I hope.

Now we can move on to the other columns you’ll need and how they can help you in the site-vetting process.
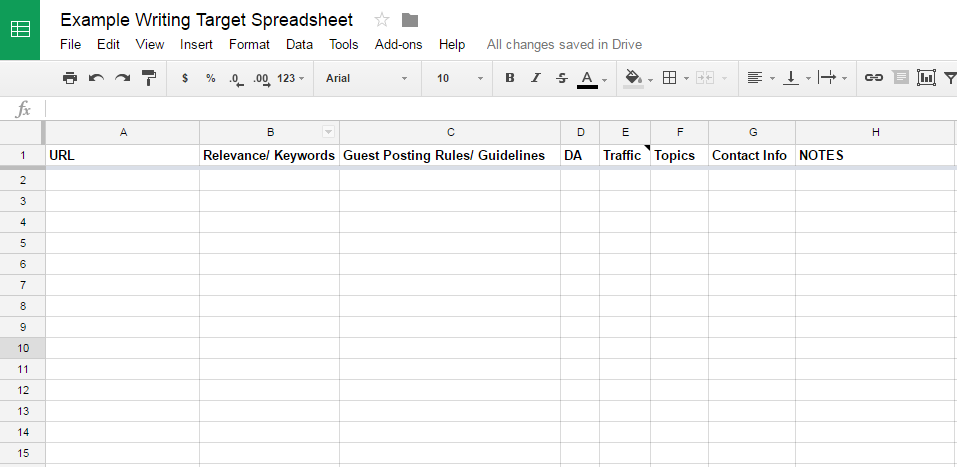
Pro tip: Freeze the top row for easier browsing down the line.
1. Relevance/ Keywords
The MOST IMPORTANT part of writing for other blogs is to know your audience. Where you write and what you write are both determined by whether you’re speaking to the right people about the right topics. Because of this, relevance needs to be the guiding element of your spreadsheet.

An easy way to fill out this column is to simply list the topics that each website puts in their navigation bar on the homepage and use them as searchable tags:

|
V
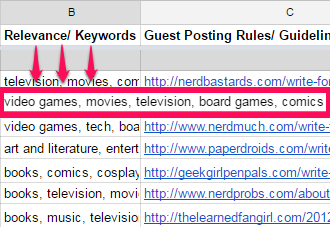
In your spreadsheet, you’ll now be able to hit “ctrl + f” and search for whatever topics you need.
By typing out each keyword, you also force yourself to consider whether the site really is a good fit for your client. If you’re going for gaming websites and find yourself writing out “recipes, cookware, chef interviews, etc.” as top navigational links on the site, you should definitely reassess whether you’re in the right place.
Bonus! Section by Relevance
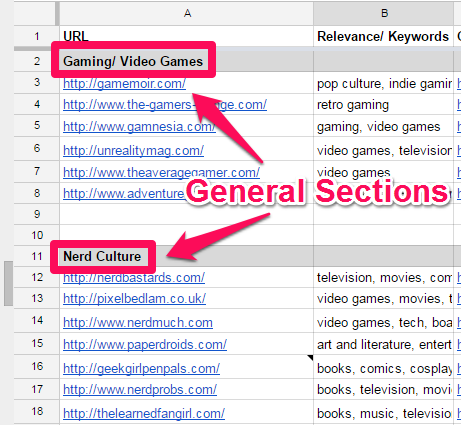
To organize your spreadsheet a little better, I recommend using the most pertinent of these tabs as a way to group your target sites by subject. Split the sites up by their general focus in your doc. This will help you craft more organized pitches (and can show you visually which topics are the most popular online).
It helps to begin with a section that’s extraordinarily niche, as close to your area of expertise as humanly possible. From there you can take a step back and expand your purview, inch by inch, to include broader niches and topics.
Here’s a visual representation of this broadening of topic:
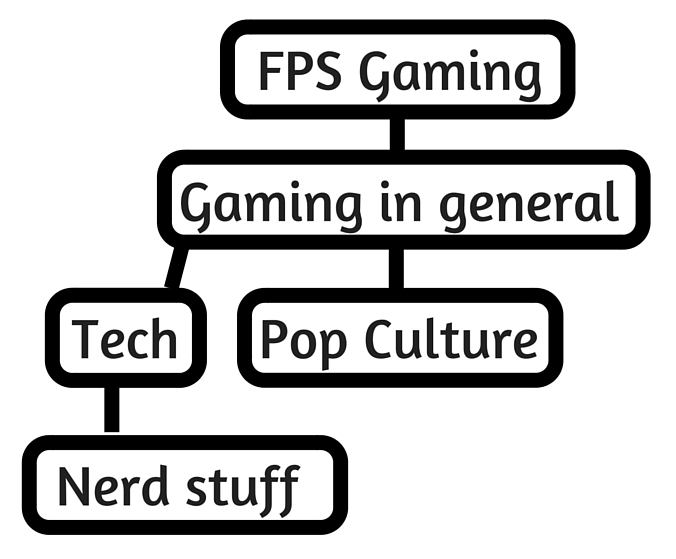
Each of these topics can be its own section on the spreadsheet. Having this hierarchy in place will help you determine what kinds of pitches to use and how much lingo each site audience is likely to understand.
Besides staying relevant to your client, you also have good reason to value relevance for your own personal growth as a writer. The more specific of a niche you contribute to consistently, the more likely you are to support a strong personal brand. Many of the highest-authority publications on the web have strict standards for their contributors–the more focused your portfolio is, the better chance you have to be considered an authority and earn a spot on their rosters.
TL;DR: Keep the long-game in mind. A relevance-focused portfolio can open doors to bigger and better publications.
2. Guest Posting Rules/ Guidelines
The presence of a “Write for Us” or “Contribution” page on a prospective site is a godsend. These are where site owners outline what they want from contributing writers, as well as valuable information about their target audience and what kinds of articles they like.

It will also show you how to avoid ticking off your prospective editor. If they tell you to use a specific timeline or use a specific subject line in your email, do it. Duh.
Some of these pages are fairly high-level:

And some are crazy in-depth:
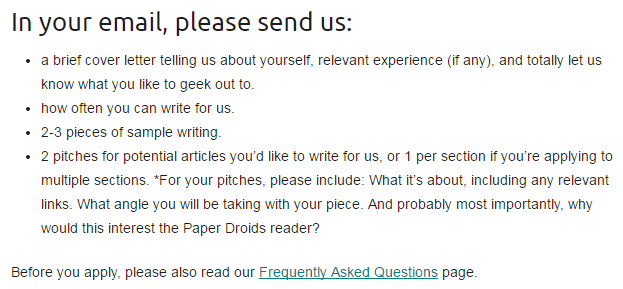
Read all of it. Carefully.
Put a link to each WFU page into this column. This way, you’ll always have quick access to all of the information whenever you need to refresh your memory.
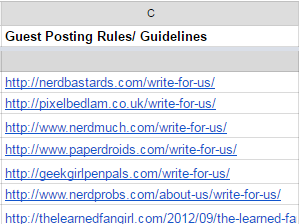
PSA: It’s important to note that many sites don’t have “write for us” pages. Don’t let this discourage you. If you can write a solid email and offer genuine value to the site’s readership, even the most authoritative sites will give you a chance. It helps if you’ve had contact with the site before or have networked a foot in the door, but sometimes cold outreach to sites can go really well. Believe in yourself! You can do eet.
3. Metrics
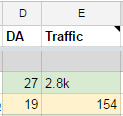
Some people take metrics more seriously than others. When it comes to assessing a potential target site, some have a minimum DA they insist on, some a minimum amount of traffic.

If these make a difference to you, add columns to your sheet to house the stats. This will simplify the vetting process as you cruise through your list later.
If you’re really, REALLY serious about metrics, you can also add a color coding system to this column so that you can better prioritize which targets to pursue:
Between you and me, though, if you prioritize relevance and choose your sites carefully based on their audiences, metrics won’t dominate your destiny nearly as much.
4. Pitch Topics/ Titles
The “pitches” section is the next most important after your “relevance” column because it will help you establish your content’s relevance to both the site’s audience and your link.

Also, all of the information about a site you’ve gathered won’t be useful if you don’t have an article in mind. There are plenty of writers on the web and an editor could very well be happy to assign topics to any one of them. The appeal of letting YOU write for their site is that you’re proposing your own unique topic.
When vetting a target site, it’s important to be able to identify what topic you can cover–pretty much immediately. Finding the right topic could take time, but you should be able to outline a couple of ideas in your mind fairly quickly while exploring the site.
If you can’t think of at least one relevant topic to pitch within at most a few minutes of finding a site, odds are that you’re in the wrong place.
This column is a good place to make note of any content gaps the site has or articles that you could write a response or rebuttal to.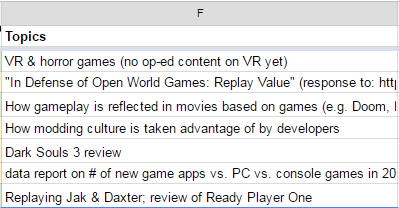
Whether you list actual article titles to pitch or keywords you could cover, this section is a good way to remember what precisely you envisioned writing for this site when you put it in your spreadsheet.
5. Contact Info
This is where you should place any information you can find on the person or people you’ll be speaking to in your outreach.

Depending on your preference, include emails, social handles, phone numbers, etc. One way to organize your info is to create separate columns for each separate contact method. However, I always prefer to put the most pertinent form of contact information into the proper cell and then create a note to contain anything else I want to remember:
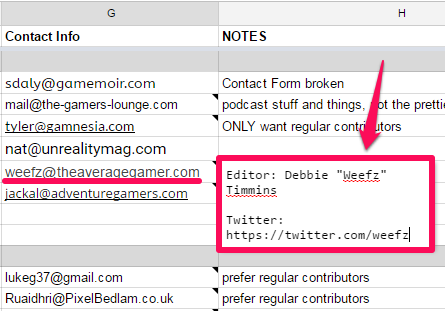
Most importantly, you need to include the name and job title of your contact. The name part is obvious: always address someone by name if you can help it. It’s just polite (and smart). Making note of your contact’s job title will help you tailor your outreach better because you’ll know what their role is and what kind of conversation you should expect to have.
Even if a site only has a webform (which is very rare so keep looking!), paste that URL into your doc. This way you won’t have to go looking if you need to use the webform again.
Something worth mentioning is that you should keep information around, even if it doesn’t pan out. If an email address is dead, keep a note that reminds you of that fact. Besides saving you time later, you might also be able to engage your contact by mentioning that another form of communication failed. That’s helpful for them to know and they just might thank you for it.
6. NOTES
Listen to me very carefully. Notes are your friend.

Frieeeeend.
You know all of those weird bits of information you think up while looking at a site for the first time? Anything like “Oh look some dead links they haven’t fixed” or “That looks like an interesting post” can be helpful to you later.
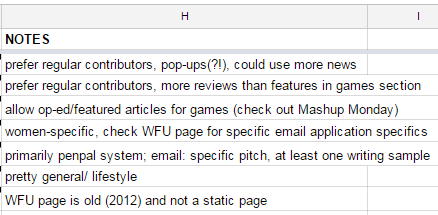
It’s worth noting what each site is looking for in a writer. If they’re very clear that they only want professional writers who can contribute all the time, you should know that going in.
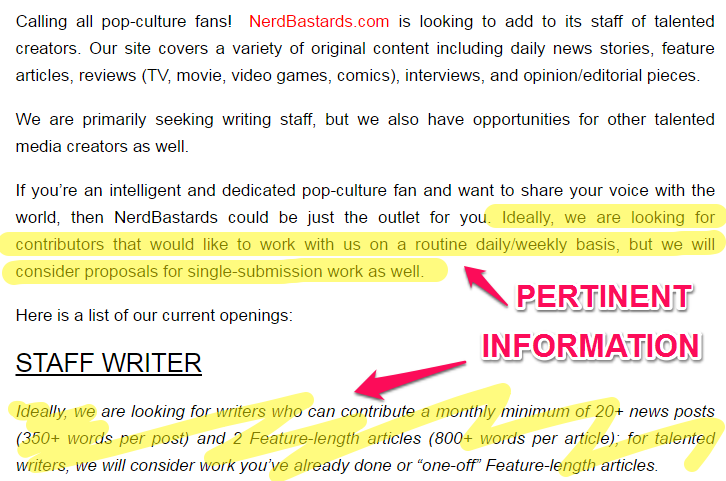
Highlighting is hard.
If they don’t have a “write for us” page at all, note that. If they’re currently switching platforms or restructuring their editorial calendar, note that. If there’s a two-month wait time between submission and publication, note that. If a site caters to a particular demographic, note that.
Note all the things.
Worst-case scenario: You have a column you rarely look at. Best-case scenario: You remember details that allow you to write a thorough, thoughtful pitch.
Note all the things.
7. Additional Columns
A couple of additional columns you might consider are:
- “Presence of influencers”
- What writers have also published on this site? You could ask one of them for an introduction or perhaps just correspond with them.
- Link information
- What landing page are you hoping to link to? What anchor text would you ideally use?
- “Outreach attempts”
- How many followups have I sent? What dates did I send these followups? (Should I leave these people alone yet?)
But you’ll learn to mix and match your spreadsheet according to your individual needs.
8. Sheets for Outreach Stages
The next step is to set up tabs on your spreadsheet so you can organize which stage of outreach you’re in with each site. As you contact new sites, you’ll be able to move them into a different spreadsheet. Not only will this allow you to keep your sites more in order, but you’ll be able to quickly and easily tell how many sites you’re in communication with and how close they are to publishing.
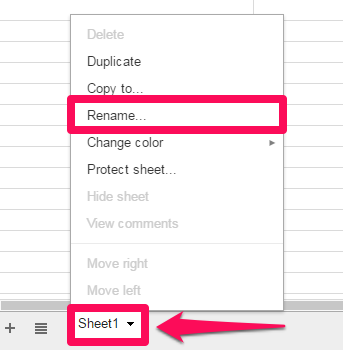
I’ve chosen to treat our initial target list as “Needs Outreach,” indicating that I haven’t yet tried to pitch these sites. I’ll name it as such by clicking on the arrow next to “Sheet1” at the bottom of the screen, then selecting “Rename”:
Now I’ll make a new tab for “In Outreach”, indicating that I’ve sent a message or pitch. I can do that by duplicating my current sheet (so as to keep my frozen top row and section heads), by again selecting the arrow in the tab at the bottom of the screen. This time select “Duplicate”:
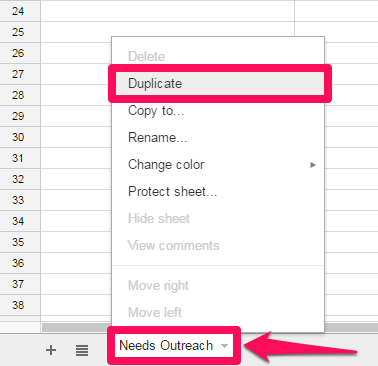
...and rename that tab accordingly.
I’ll repeat this process to create other tabs, based on how I like to organize my prospects. For my spreadsheet, I want these:
- “Needs Outreach”
- For sites I’ve found but have not yet contacted.
- “In Outreach”
- For sites I’ve emailed at least once.
- “In Communication” tab
- For sites that have gotten back to me.
- “Link Acquired”
- For sites where I’ve successfully published.
- “Never Responded”
- For sites that I’ve received no reply from.
- “Dead”
- For sites who have asked me not to reach out again for whatever reason (not accepting outside contributions, shutting down the site, etc.-- make a note!).
- “On Hold”
- For sites that have requested that I reach out again at a later date. Or for sites that I’m waiting to outreach, say if I know a better linkable asset is being developed.
I can easily flip between these tabs and move sites between them as I navigate my relationship with each site. Also note that you can search all tabs at once by using the "ctrl + h" function.
So let’s look at what we’ve wrought.
We have a spreadsheet to house pertinent information about writing targets. Each column of this spreadsheet functions as a portion of a site quality check.
A tool like this can save you hours of time and ages of headache.
In this day and age, using a spreadsheet like this can seem a bit crude. But when it comes to versatile organization (and again with the free bit), very few things beat a good spreadsheet. Play around and see what columns and tabs work best for you.

