In this installment of Tutorial Tuesday, I will be discussing quick wins with image link building.
Building links through images is similar to mention link building, in that you’re looking for instance of someone using an image associated with your company, brand, or website online. From there it’s as simple as asking for a link. This is a great tactic at the start of a campaign, although reverse image searches should be run periodically throughout a campaign as well.
So, without further ado, here is quick tutorial on image link building.
Step 1: Create a list of company images
The first step you need to take is to gather a list of any and all images relevant to your company, brand, or website. Some examples of these types of images include:
- Logos – old and new
- Branded imagery
- Product photos
- Drawings
- Graphics
- Illustrations
- Cinemegraphs
- Proprietary images
- Corporate headshots
- Company buildings
- Etc.
It is important to be thorough when generating this list as you want to include every image you think other sites could possibly be using around the web. It is better to spend some time to search an image and find out nobody is using it, rather than assume an image is not being used and miss out on potential link equity from those who are indeed using it.
Step 2: Search for images
After you have created your list of images others might be using, the next step is to search for those images and find where they are being used on the internet.
The best way to find these images is by using reverse image search. There are a few easy options for performing a reverse image search – Google image search, TinEye, or Image Raider (which we will cover a little later on).
Google image search is pretty straightforward, but here is a quick walkthrough:
First, you need to go to - http://images.google.com/

Next, you have four different options to search an image:
- Drag and drop
- Upload an image
- Copy and paste the URL
- Right click w/ Chrome extension
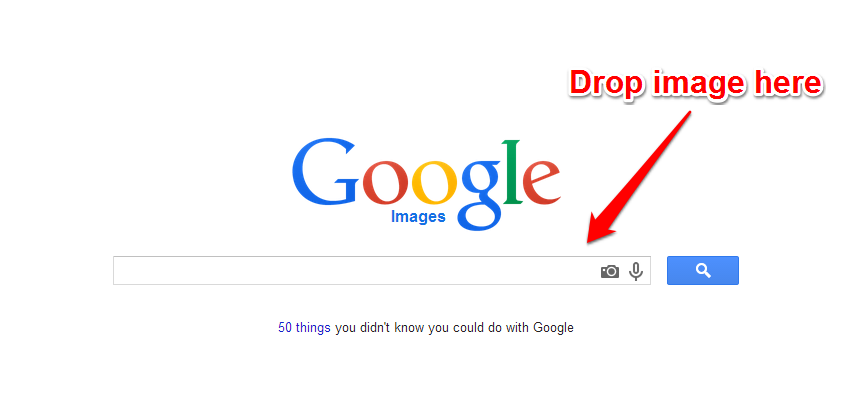
Drag and Drop
The first option involves simply dragging an image from the web or your computer and dropping it into the search box.
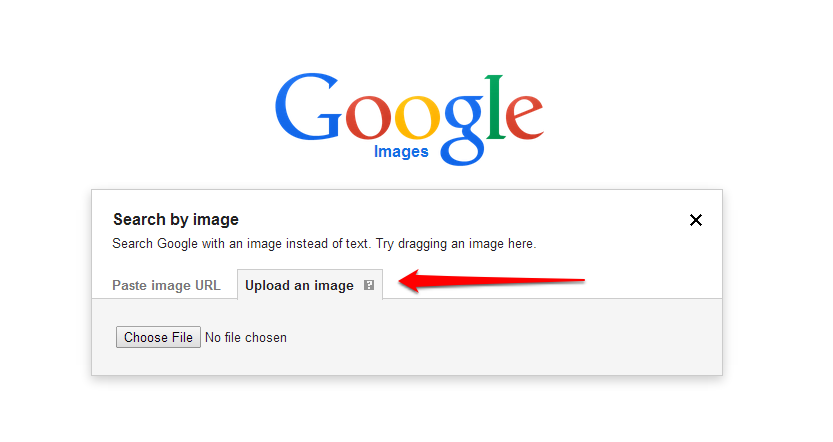
Upload an image
The second option involves uploading an image from your computer to search. To do this, simply click the camera icon on the search bar.

Then select “Upload an image”
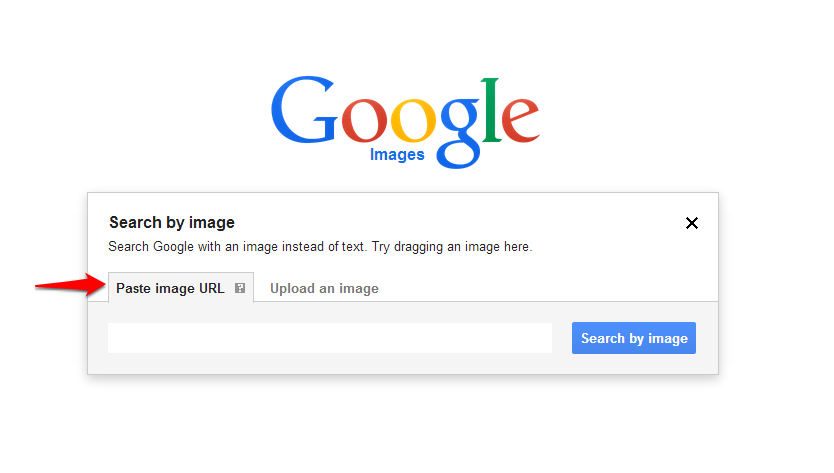
Copy and paste URL
The next option involves copying the URL of an image you’ve found on the web. Simply right-click on the image and select copy URL. Next, go back to Google image search and click the camera icon, but this time select “Paste image URL”
Right-click w/ Chrome extension
Finally, the last option you have is to use the Google Search by Image extension. Once you download and install the extension, all you have to do to search an image is right-click on it.
Another reverse image search tool that is easy to use is TinEye.
You have two options when searching for your image within TinEye – upload your image or type in the image’s URL.
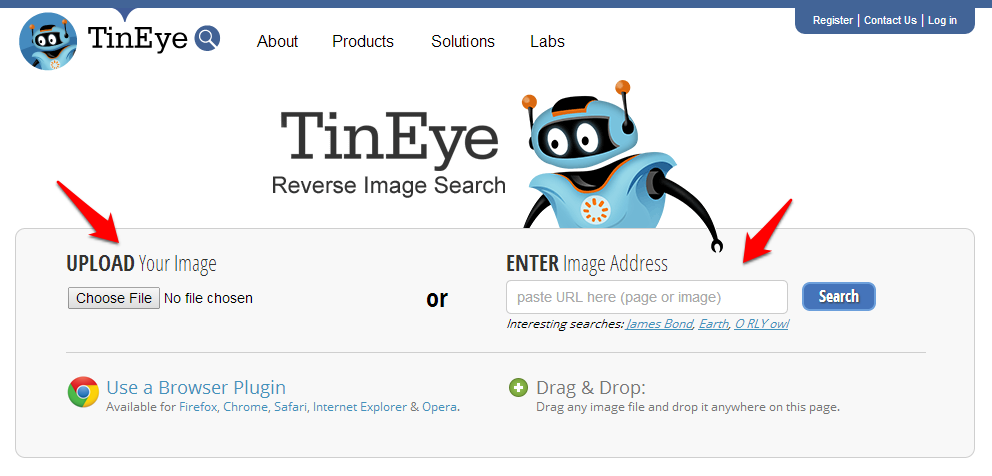
Both options will work and it really just depends on if you have the images on your computer already or not.
Here are the results I get when uploading a headshot of Page One Power CEO Jon Ball:

You can see how impressive TinEye is, as it searched over five billion sites in less than three seconds and found nine places where Jon’s headshot is showing up.
TinEye provides you links to where the image is being used.
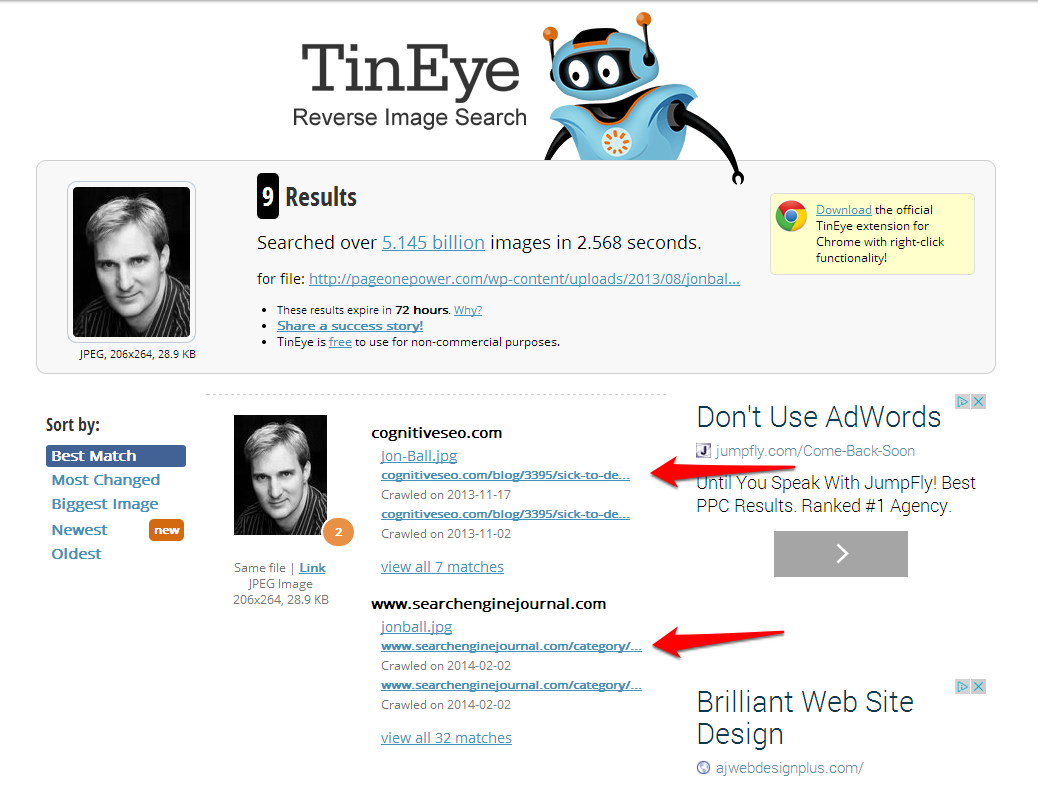
By following these links you can quickly see if the site using your image is linking back to you/the image source.
Both TinEye and Google image search can be useful for tracking down your images on the web, but there is one more tool that you can use that’s slightly different.
As mentioned before, that tool is Image Raider.
Image Raider is another reverse image search tool, but is different from the other two as it is automated and can be used for ongoing searches of your images. This can be very helpful as it will notify if any sites use your images in the future, which means more link opportunities. Image Raider is similar to Google Alerts, but for images.
Image Raider gives you four different options for uploading your images:
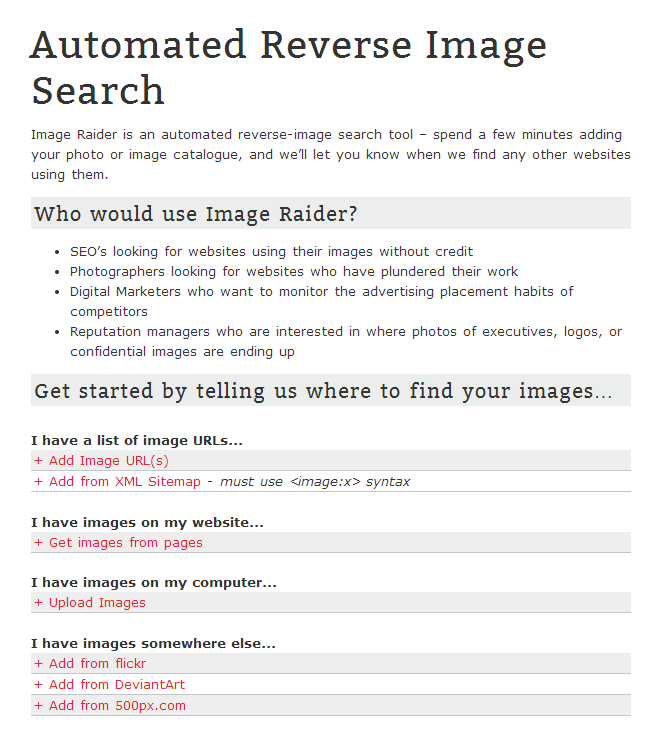
Simply upload your photos using one of these four methods and you will be able to find existing and future uses of your images.
Step 3: Compile an outreach list
The next step is to compile an outreach list, although ideally you’ll be doing this while actively tracking your images across the web.
This list will include the sites using your images that you feel present the best link building opportunity.
First, make sure you find the most appropriate person to contact, as this will save you time and increase your chances of success. Then it is important to create a list or document that contains pertinent information you want to track.
Here is a quick list of what we typically track when we do outreach at P1P:
- Name of contact
- Date contacted
- Email address
- Social profile/s
- URL of image
- Image type
- Specific image used
- Etc.
Making sure you have the best available information on your outreach list will improve your chances for successful outreach.
Step 4: Outreach
Finally, it’s time to outreach to the webmasters using your images.
Now this probably sounds easy enough, but there are some best practices to keep in mind.
Some people might be tempted to approach this outreach in a confrontational manner – telling the webmaster “you’re using our copyrighted image, you must take this down”. However, this is the wrong way to go about your outreach and can result in people having a poor experience with your brand.
You must always remember that you are representing your brand when outreaching and that a friendly and polite approach is best. Something along the lines of:
Dear [webmaster],
I came across your site and noticed that you have posted one of our company’s images. I wanted to say thank you for using our image and ask if you wouldn’t mind linking back to its original source.
Here is the original source of the image – [source URL]
Thank you,
[Your name]
Not only is this an opportunity to build a link, it is also an opportunity to build a relationship.
To learn more about outreach best practices, check out this post.
Step 5: Acquire links and say thank you
Last but not least, it is important to follow up with any webmasters that link your image back to you.
Again, this is a great opportunity to build a relationship for the future. It doesn’t take long to send a quick thank you email and it will reflect positively on your brand.
Quick Recap
So to put it all together, here is a quick recap of the whole process:
- Step 1: Create a list of company images
- Step 2: Search for images
- Step 3: Compile an outreach list
- Step 4: Outreach to webmasters
- Step 5: Acquire links and say thank you
That’s it for this edition of Tutorial Tuesday, I hope you enjoyed reading this short guide and learned a little about image link building!